Spec-driven development for Agentic Coding

Dean Jain
Senior Staff Software Engineer · Enterprise AI, Data & Cloud Architect
· 22 min read
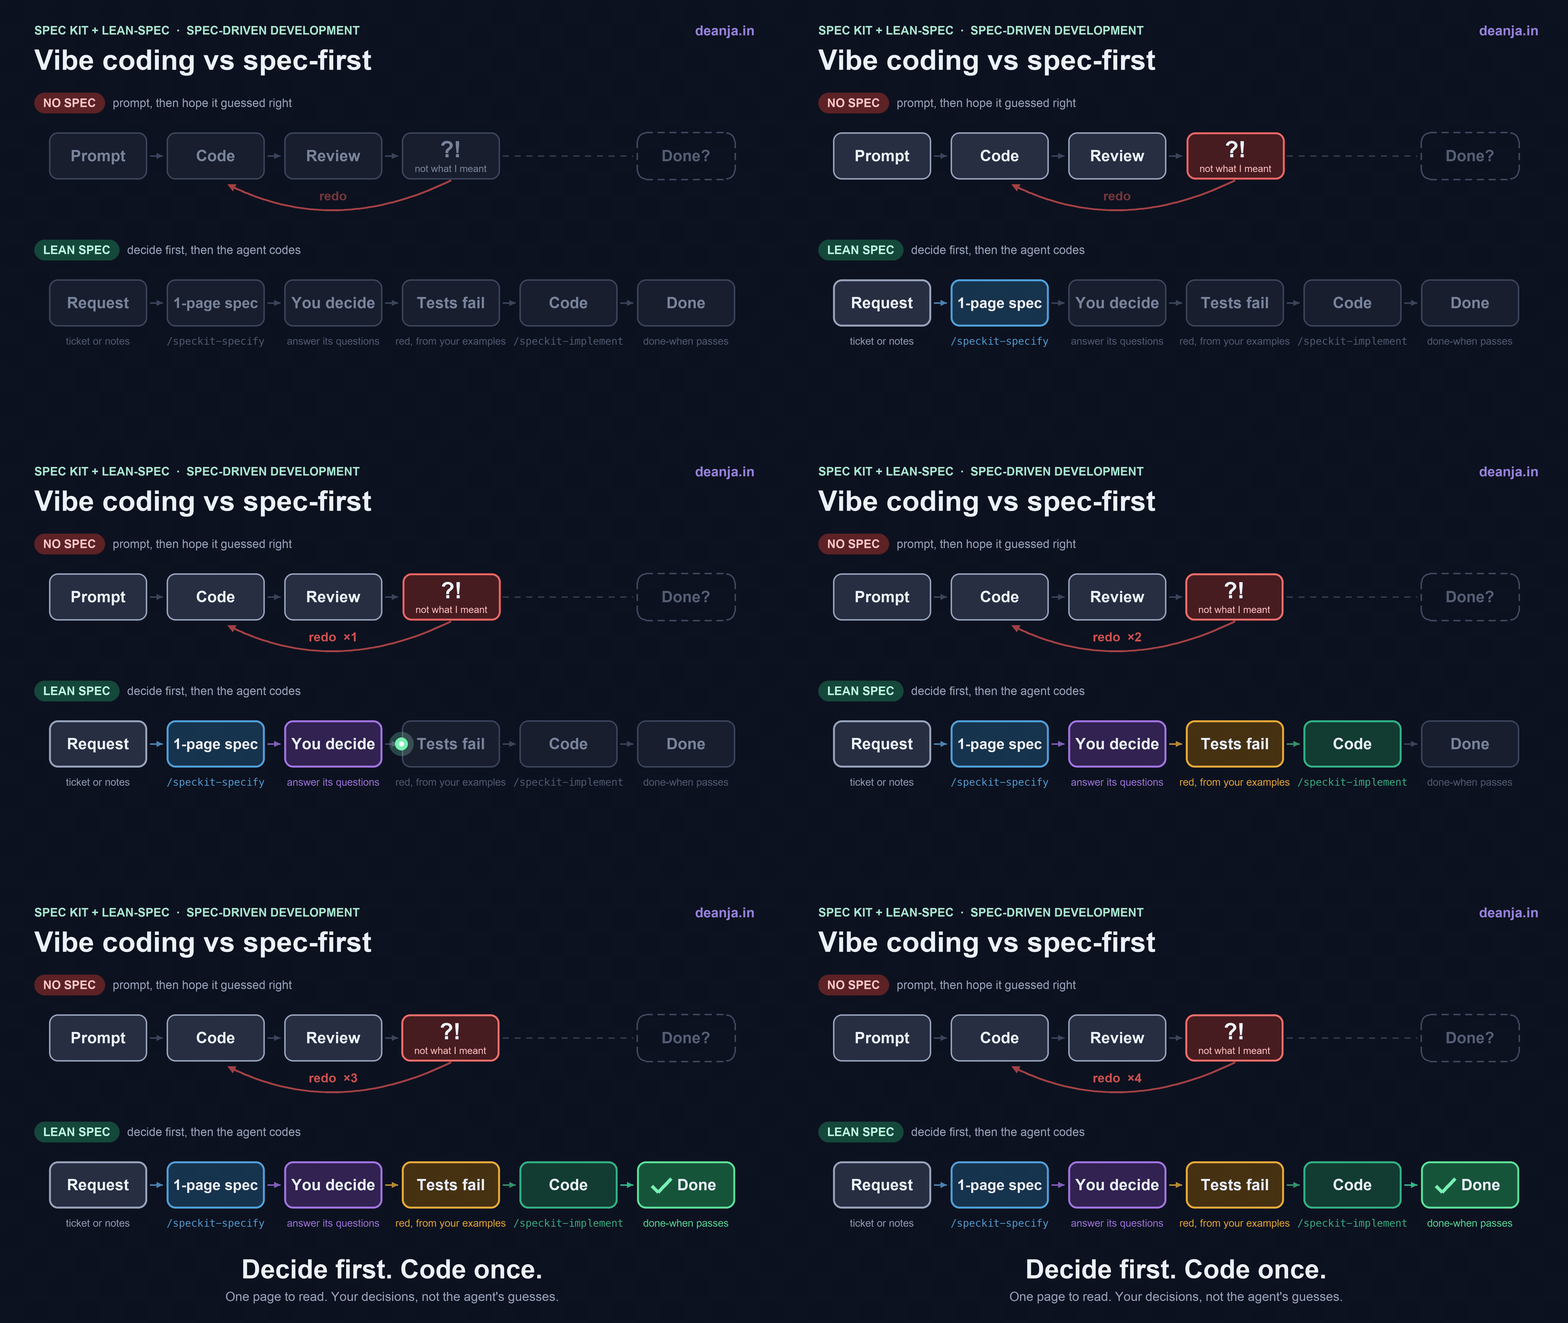
Figure 1: Without a spec, the agent guesses and you find out in review. With lean-spec, you settle the open questions first, and the work is done when your test command passes.
📚 This is Part 2, the spec. ← Part 1, Agents Write the Code. Our Job Got Bigger. covers why review became the constraint.
What Spec Kit is. Spec Kit is GitHub’s free toolkit for spec-driven development. Before a coding agent writes any code, you write a spec: what to build, the rules it must follow, and how you’ll know it works. It gets the hard part right: decide first, code second.
The problem. It treats every feature like a big one. I used it to add one small endpoint to a toy API, and before a single line of code it wrote eight markdown files, 701 lines, most of them a plan and a task list the feature didn’t need. It also guessed four decisions without asking me, and it never named the command that decides when the work is done.
What I’m proposing. lean-spec, a four-file preset that plugs into Spec Kit and changes three things for small features:
- 📄 One page instead of eight files. A short spec with five headings, and nothing else to read before the code.
- ❓ Questions instead of guesses. Anything the request leaves open comes back to you, with options to pick from.
- 🏁 A done-when command. You choose the test command, and the agent isn’t finished until it passes.
Here’s what each way cost on the same small feature, and after that, how to use it step by step.
---
title: "SpecKit Default Vs SpecKit Lean"
config:
  theme: dark
  fontSize: 16
  themeVariables:
    fontFamily: "Comic Sans MS, Comic Neue, Chalkboard SE, cursive"
    fontSize: "16px"
  flowchart:
    wrappingWidth: 220
    nodeSpacing: 60
    rankSpacing: 36
---
%% animate
flowchart TD
    D0["🐢<br/>Default Spec Kit<br/>as it installs"]:::neutral
    D1["📝 specify, 2 docs<br/>guesses 4 decisions<br/>agent 59 s"]:::neutral
    D2["❓ clarify<br/>asks 2 questions<br/>agent 96 s<br/>read 8 min"]:::neutral
    D3["🗺️ plan, 5 docs<br/>agent 99 s<br/>read 11 min"]:::neutral
    D4["📋 tasks, 1 doc<br/>29-task checklist<br/>agent 94 s<br/>read 10 min"]:::neutral
    D5["🤖 implement<br/>+ converge<br/>agent 138 s<br/>review 23 min"]:::agent
    D6["8 docs, 6,811 words<br/>$4.42, 8.1 min of agent<br/>≈ 52 min for you"]:::warn
    D0 --> D1 --> D2 --> D3 --> D4 --> D5 --> D6

    L0["⚡<br/>lean-spec preset<br/>my four-file add-on"]:::good
    L1["📝 specify<br/>asks 3 questions<br/>agent 28 s"]:::obs
    L2["🧑 you answer<br/>two short replies<br/>agent 29 s"]:::gate
    L3["👀 you read<br/>the one-page spec<br/>read 2 min"]:::gate
    L4["🤖 implement<br/>tests first<br/>agent 41 s<br/>review 17 min"]:::agent
    L5["✅ you run<br/>the done-when command<br/>takes seconds"]:::gate
    L6["1 page, 469 words<br/>$1.41, 1.6 min of agent<br/>≈ 19 min for you"]:::good
    L0 --> L1 --> L2 --> L3 --> L4 --> L5 --> L6

    W["🏆<br/>Spec reading 14.5× less<br/>Code review 1.4× less<br/>Total time 2.7× less"]:::good
    D6 -.-> W
    L6 -.-> W

    classDef neutral fill:#ECECEC,stroke:#8A8A8A,stroke-width:2px,color:#0F172A
    classDef warn fill:#FFE6A8,stroke:#E0A106,stroke-width:2px,color:#0F172A
    classDef obs fill:#AED6F1,stroke:#2E86C1,stroke-width:2px,color:#0F172A
    classDef gate fill:#D7C3F2,stroke:#8E5BD0,stroke-width:2px,color:#0F172A
    classDef agent fill:#FFE08A,stroke:#E8A33D,stroke-width:2px,color:#0F172A
    classDef good fill:#BFEFC8,stroke:#3FA34D,stroke-width:2px,color:#0F172A
Figure 2: The same small feature built both ways, with the numbers from my run. Clarify is an optional step that asks follow-up questions, and converge checks the code against the spec. The done-when command is the one test command that decides the work is finished. Agent times are measured. Read and review minutes are estimates for a person, at the published speeds in section 4. Spec reading drops 14.5×, from about 29 minutes to 2. Code review drops only 1.4×, from 23 minutes to 17, because both flows write about the same amount of code. So your total time drops 2.7×, from 52 minutes to 19.
📌 TL;DR
- Spec Kit is GitHub’s free toolkit for writing a spec before an agent codes. It adds slash commands like
/speckit-specifyto your agent, and most of them write a markdown file into your repo. - Out of the box, it’s built for big features. For one small feature, default Spec Kit wrote 8 files and 701 lines before any code. The lean-spec preset wrote one 40-line page. That’s 14.5× less spec reading, 1.4× less code review and 2.7× less of your time in total. The default flow cost $4.42 in AI usage and the lean-spec one $1.41, by the estimate from Claude Code, the coding agent I used.
- Asking beat guessing, but neither was perfect. I scored both with hidden tests, automated checks neither agent saw. Both passed every test drawn from the request. Of five team decisions the request left open, default Spec Kit got one right. My answers to lean-spec’s questions settled three of them.
- A preset makes it lean. Mine, lean-spec, swaps three things: a one-page spec template, a
/speckit-specifythat asks instead of guessing, and a/speckit-implementthat keeps going until your done-when command passes. - Two decisions stay with a person: what’s out of scope, and the done-when command.
- Big features still get the full flow of plan, then tasks, then implement. Spec Kit’s plan and tasks steps work from a one-page spec too, though the tasks step has to group the rules into user stories itself.
🧰 1. What Spec Kit is
You install a small command-line tool, specify, and run it once in your repo. It adds slash commands to your coding agent (Claude Code, Codex, GitHub Copilot, Gemini CLI and others), and most of them write a markdown file next to your code.
| Command | What it does |
|---|---|
/speckit-specify | Writes the spec |
/speckit-clarify | Optional: asks up to five follow-up questions about it |
/speckit-plan | Turns the spec into a technical plan |
/speckit-tasks | Breaks the plan into steps |
/speckit-implement | Writes the code |
/speckit-converge | Checks the finished code against the spec |
There’s no separate testing step. Tests are optional tasks, written only when the spec asks for them.
Everything is plain text in the repo, so the spec and the code arrive in the same pull request. Nobody digs the requirements out of a wiki six months later. It also gets the hard habits right: MUST rules instead of “should”, Given/When/Then examples, and a [NEEDS CLARIFICATION] marker on the gaps that matter, with options to pick from.
🐢 2. Why it feels heavy for a small feature
I’m not the first to say so. Colin Eberhardt built a feature of about 1,000 lines twice in November 2025. With Spec Kit, the first of two parts alone took 33 and a half minutes of agent time, three and a half hours of review and 2,577 lines of markdown. His usual way built all of it in 8 minutes of agent time and under half an hour of review and testing. Birgitta Böckeler tried it on a 3–5 point story and called it “overkill for the size of the problem”.
Both reviews are from late 2025, so I ran it again this month, on version 1.1.3, against a toy API: one small feature, one new endpoint. Before any code, default Spec Kit still wrote eight files: a spec, a quality checklist, a plan, research notes, a data model, an API contract, a quickstart guide and a task list. The plan and tasks steps wrote 537 of the 701 lines.
Three defaults in its prompts explain it. Each is right for a big feature and wrong for a small one.
| Default | What it does to a small feature |
|---|---|
| 🧱 The spec can’t name the code: “No implementation details” | Naming the endpoint waits for the plan, so even a small feature goes through plan, tasks and implement |
| ❓ It guesses: “Make informed guesses”, with three questions at most | In my run it asked nothing and decided four things alone, such as how matching works and whether a list has a limit |
| 🏁 Done is a business goal: success criteria must be “technology-agnostic” | The spec never names a test command, so the agent decides for itself when it’s done, and nothing stops it editing a test until it passes |
🛠️ 3. Using lean-spec, step by step
Setup takes a few minutes. Each feature after that is two commands, one short answer and one page to read. Every step says what you do and how to check it worked, and every command says where it goes: your terminal, your agent’s chat, or a file.
Before you start
| You need | Why |
|---|---|
| A git repo with your work committed, and a remote if you want a pull request | Spec Kit writes into the repo, and step 5 opens a pull request |
| Python 3.11 or newer, and uv | Spec Kit installs with uv |
| A coding agent, installed and signed in: Claude Code, Codex, GitHub Copilot or Gemini CLI | It runs the two commands |
Your project’s test command, such as npm test | It becomes the done-when command |
| macOS or Linux, with curl and unzip | The commands assume them. On Windows, use Windows Subsystem for Linux |
Setup: once per machine, then once per repo
What you do. Install Spec Kit’s specify tool, keep one copy of the preset on your machine, then add both to the repo with one command. In your terminal:
# Once per machine
uv tool install specify-cli     # or: uv tool upgrade specify-cli
specify version                 # should say 1.1.3 or newer
curl -fsSLo ~/lean-spec.zip https://deanja.in/templates/lean-spec.zip
unzip -o ~/lean-spec.zip -d ~/lean-spec

# Point Spec Kit's scripts at a Python that has PyYAML (presets need it)
echo "export SPECKIT_PYTHON_EXECUTABLE=\"$(uv tool dir)/specify-cli/bin/python\"" >> ~/.zshrc   # ~/.bashrc on bash
source ~/.zshrc

# Once per repo, from its root folder, with your work committed
specify init --here --force --integration claude --preset ~/lean-spec
The SPECKIT_PYTHON_EXECUTABLE line matters: with a preset installed, Spec Kit’s scripts read its manifest with PyYAML, and a fresh machine’s python3 often doesn’t have it. The line points them at the Python inside your specify install, which does.
--here means this folder, and --force skips the are-you-sure prompt for a folder that isn’t empty. It may replace Spec Kit’s own files if they’re already there, but it doesn’t touch your code. If your terminal can’t find specify, run uv tool update-shell and open a new terminal.
Spec Kit’s preset reference covers how presets work. Mine has four files: a manifest (preset.yml), the one-page spec template, and the prompts behind /speckit-specify and /speckit-implement. Everything else in Spec Kit stays as it ships, and removing the preset brings the defaults back.
Swap claude for your agent. Each one gets the commands in its own folder and spells them a little differently:
| Agent | --integration | Commands land in | You type |
|---|---|---|---|
| Claude Code | claude | .claude/skills/ | /speckit-specify |
| Codex | codex | .agents/skills/ | $speckit-specify |
| GitHub Copilot | copilot | .github/skills/ | /speckit-specify |
| Gemini CLI | gemini | .gemini/commands/ | /speckit.specify |
The rest of this article uses Claude Code’s spelling. Init also prints a “Next Steps” box listing more commands. Skip them, /speckit-constitution included: you’ll write the constitution by hand in the next step, and the walkthrough needs only two commands.
Check it worked. specify preset list should show “Lean Spec”. If it doesn’t, add it with specify preset add --dev ~/lean-spec. Then "$SPECKIT_PYTHON_EXECUTABLE" -c 'import yaml' should print nothing. Last, start your agent from the repo’s root folder, or restart it if it was already open, so it loads the new commands, and type /speckit in its chat: /speckit-specify should be described as “Draft a one-page spec from a ticket, notes or a thread”, which is how you know it’s lean-spec’s version.
Write the constitution
The constitution is a short file of rules that hold for every change in the repo: how code is designed, named, tested and kept safe. specify init created it at .specify/memory/constitution.md, full of placeholders.
Why it matters. Both lean-spec commands read the constitution before they write anything. /speckit-specify reads it so the spec doesn’t repeat it, and /speckit-implement reads it so the code follows it.
Specs stay short, because a rule written once here never has to appear in a spec. In my comparison run, which used its own five-rule constitution, default Spec Kit spent three of its ten requirements repeating that constitution; lean-spec spent none. The agent writes code your way instead of falling back on its own habits. And reviewers get a checklist: a pull request that breaks a constitution rule is wrong, whatever its tests say.
What you do. Open the file and replace the placeholders with your rules. Write each one as a MUST or NEVER, short enough to check in a review, and keep the list under a page. I’d rather give an agent ten clear rules than forty vague ones. Here’s a sample to start from, built on well-known design principles. Edit it to fit your stack:
# Constitution

## Design
1. KISS (keep it simple): the design MUST be the simplest that meets the spec.
   NEVER add a layer, pattern or setting that no rule asks for.
2. YAGNI (you aren't gonna need it): build only what the current spec asks.
   NEVER add code "for later".
3. DRY (don't repeat yourself): each rule or fact MUST live in one place.
   Reuse an existing helper before writing a new one. NEVER copy-paste logic.
4. Single responsibility: each module, class and function MUST do one job. If
   it takes "and" to describe it, split it.
5. Code MUST reach the database, network, clock and files through an interface,
   so tests can swap them.
6. Match the code around you: its structure, naming and error style. NEVER add
   a second way to do something the repo already does.

## Code
7. Names MUST say what a thing is or does. NEVER use unexplained abbreviations.
8. Return early instead of nesting. A function that doesn't fit on one screen
   MUST be split.
9. Errors MUST be handled where they can be acted on. NEVER swallow one
   silently.
10. NEVER commit secrets or keys; read them from a secret store. NEVER log
    personal data.

## Tests
11. Every new rule in a spec MUST get a test, written before the code, that
    fails first. A rule about behaviour that must keep working gets a test
    that passes before and after.
12. NEVER weaken, skip or delete a test to make it pass.
Rules 4 and 5 borrow from SOLID: single responsibility, and depending on abstractions rather than concrete details. My piece on SOLID in the agent era covers all five. Add a few rules only your repo has, such as “every error uses the shared error helper” or “every schema change ships with a migration”. Leave the test command out: each spec names its own done-when command, and that’s where “done” lives.
Check it worked. Commit the setup and the constitution together, in your terminal:
git add .specify .claude/skills
git commit -m "Add Spec Kit with lean-spec"
git show --stat     # constitution.md should be in the list
For another agent, add its folder from the table instead of .claude/skills. If git says .claude is ignored, use git add -f .claude/skills; the skills folder holds only prompts.
Step 1: start the spec with /speckit-specify
What you do. Start a branch in your terminal: git switch -c <feature-name>. Copy the feature request from wherever it lives, a ticket, a chat thread or an email. In your agent’s chat, type /speckit-specify, a space, and paste the request after it as one message. Don’t tidy it, and don’t create a file. Approve the agent when it asks to run Spec Kit’s script.
What happens. The agent creates a folder for the feature, such as specs/001-<feature-name>/, and fills in a one-page spec.md. It names the code to build and one existing file to copy. Anything the request leaves open becomes a short numbered question, with options and its pick marked.
Check it worked. The agent names the spec file it created and lists its questions.
Step 2: answer its questions
What you do. Reply in the same chat, one message covering every question: an option letter or your own answer. Answer any follow-up too.
Why. Each question is a decision that would otherwise become a guess inside the code. Read the options rather than accepting its picks: in my run, two of its three picks were the same guesses default Spec Kit made on its own.
Two answers always stay with you: what’s out of scope, and the done-when command. The agent always asks for the command, but it only asks about scope when the request obviously leaves parts out, so check scope yourself in step 3.
Check it worked. The agent says no questions are left, and spec.md no longer contains NEEDS CLARIFICATION.
Step 3: read the page, then commit it
What you do. Open spec.md and read it. It’s about a page, two minutes. Fix anything wrong by editing the file or asking the agent. Then commit: git add specs && git commit -m "Spec: <feature>".
Why. It’s the cheapest moment to change your mind, and the examples in it become the tests in the next step. The page has five headings:
| Heading | What it holds |
|---|---|
| Why | The pain today, not the solution |
| What to build | What to build, how it’s called, what it returns, and a Like line naming one existing file to copy |
| Rules | Numbered MUST or NEVER rules, each with one Given/When/Then example, including what must keep working |
| Out of scope | What not to build and what not to touch, each with a reason |
| Done when | The one command that must exit 0 |
Read the rules for what’s missing as well as what’s wrong. In my run, the request never mentioned one case, the agent never asked about it, and that’s the one decision lean-spec got wrong in section 4. If Out of scope is missing or thin, add what you’re not building and the files nobody may touch.
Check it worked. git show --stat lists spec.md.
Step 4: /speckit-implement builds it
What you do. In your agent’s chat, type /speckit-implement and wait. When it reports, run the done-when command yourself, in your terminal.
What happens. Working from the spec alone, with no plan or task list, the agent:
- Writes a test from each rule’s example, and watches it fail before writing code. Tests for behaviour that must keep working pass from the start.
- Builds until the tests pass, copying the style of the file on the Like line.
- Builds nothing out of scope, and stops to ask if it can’t stay inside those lines.
- Runs the done-when command exactly as written. It may not edit the command or weaken a test.
- Reports every changed file against the rule it serves, and flags anything no rule asked for.
These are instructions to the model, not locks.
That’s why you run the command yourself, and why the reviewer compares the tests against the spec’s examples.
Check it worked. Run the done-when command, then echo $?. It prints 0.
Step 5: open the pull request
What you do. In your terminal, commit the code and push the branch:
git add -A && git commit -m "<feature>"
git push -u origin <feature-name>
gh pr create --fill     # or open the pull request on GitHub
Paste the agent’s report into the pull request’s description.
Why. The reviewer reads the one-page spec first, then the code, using the report to match each changed file to a rule. Any file that serves no rule is where to look hardest. Part 3 of this series, coming soon, covers what the CI check on that pull request should prove.
Check it worked. The pull request shows the spec and the code together, and its CI check runs your done-when command and passes.
When the feature is bigger
Some features need a design first: a new table, a second service, a choice between two architectures. Run /speckit-plan and then /speckit-tasks after step 3, then carry on with step 4. The preset stays installed, and its implement prompt follows tasks.md whenever one exists.
I switch to the full flow when there’s no existing file to copy, because then there’s no pattern to follow yet, and working one out is what a plan is for. When a spec needs more than eight rules, the preset says so, and I split the feature in two.
📊 4. Cost, time and quality, side by side
Caveats first. The test feature was a blog-posts endpoint on a toy portfolio API: a list of posts, newest first, with a topic filter. The comparison is one run of each, on a toy repo I built for the test, with one model: Claude Opus 5.5 in Claude Code. Both ran on Spec Kit 1.1.3. For default Spec Kit I followed its main flow and also ran /speckit-clarify, because its own output recommended it. Agent time leaves out waiting for answers.
I wrote the preset before I picked this feature, so it wasn’t tuned to it. My first lean-spec run used the preset’s version 1.0.2. It read Spec Kit’s default template by mistake, instead of the copy of my template it had just made as spec.md. I added one line telling it which file to read, then reran on lean-spec 1.0.3. That fixed a file mix-up, not a decision. The published 1.0.5 only rewords that line and lets keep-working tests pass from the start. I didn’t compare against an agent with no Spec Kit at all, which Eberhardt found cheapest.
The dollar figures need explaining, because Spec Kit itself is free. Every agent session runs on an AI model, and a model is paid for by the token. Claude Code counts the tokens in each session and prices them at the list price, so each figure is its estimate of what that work costs.
On a subscription plan you don’t pay per run, but the figure still measures how much work each approach asked of the model. More documents means more tokens written, and every later step reads them again.
Nobody timed a person, so the read and review times are estimates. Documents are counted at 238 words a minute, the average adult reading speed for non-fiction in Brysbaert’s 2019 review of 190 studies. Code is counted at 500 lines an hour, the rate above which SmartBear’s research found reviewers miss more defects. SmartBear sells code-review tools, so that’s a vendor’s number. Both rates are brisk, so treat them as the least time a careful reviewer needs.
How I checked quality
Before either run, I wrote eleven hidden acceptance tests. They’re automated tests in TypeScript, 122 lines. Each calls the new handler with a request, the way a web server would, and checks the response. Six come from the request and the run’s own constitution. They check newest first, the topic filter, no drafts, no private notes, a 503 on a timeout, and each post’s slug, title and date. Five check the answers I’d give if asked: hide scheduled posts, ignore capitals in the topic, 10 posts by default, at most 50, and same-date posts in title order.
I froze them with a checksum, and neither agent saw them. They’re a measuring tool for this comparison, not part of the everyday flow. I didn’t time how long they took to write, and that time isn’t in either flow’s person-minute totals below, since neither flow needs them. Day to day, the Given/When/Then examples in your spec are your acceptance tests, and step 4 turns them into automated tests.
| Default Spec Kit | lean-spec preset | |
|---|---|---|
| 🧑 Agent runs (one per command or answer) | 8 | 4 |
| 📄 Spec reading before code | 8 files, 6,811 words, about 29 min | 1 file, 469 words, about 2 min (14.5× less) |
| 🔍 Code review | 191 lines, about 23 min | 142 lines, about 17 min (1.4× less) |
| ⏱️ Your total time, reading plus review | about 52 min | about 19 min (2.7× less) |
| 💸 AI cost and agent time | $4.42, 8.1 min | $1.41, 1.6 min |
| ❓ Team decisions guessed, not asked | 4, and clarify fixed 1 | 2 it never raised |
| 🔁 Requirements that repeat the constitution | 3 of 10 | none of 6 |
| 🧪 New tests written by the agent | 17 | 12 |
| ✅ Hidden tests: from the request | 6 of 6 | 6 of 6 |
| ✅ Hidden tests: team decisions | 1 of 5 | 4 of 5, one by luck |
Both versions built what the request asked for: all six request-based tests passed on both, so lean-spec didn’t buy its speed with broken code.
The gap is in the five decisions the request left open. Default Spec Kit made four guesses that settled all five, and got one right, because clarify asked me about it. lean-spec asked, and my answers settled three. It missed one case it never raised, and passed the fifth by luck.
Default Spec Kit did write more tests, 17 to 12, and its clarify step caught the case lean-spec missed. But it got there through eight documents, for about 52 minutes of a person’s time against 19. I’d still pay for a plan when a feature has real design questions. On a small feature like this one, those documents are mostly cost.
🚀 5. Rolling it out
The preset is four files and about 200 lines. Read them before you install them. That’s Spec Kit’s own advice for anything from outside its core: “Review source code before installation and use it at your own discretion.”
In regulated financial services, where I work, I’d go one step further. I’d keep the preset in an internal repo, so a change to how agents get briefed is reviewed like any other change.
Since version 1.1.1, per its release notes, Spec Kit makes that practical. A team can host its own preset catalog, a list of approved presets that specify installs from. Once lean-spec is listed there, specify preset add lean-spec --version 1.0.5 installs that exact release. Spec Kit checks that the download is that release before it changes anything. That’s how I’d treat any pattern a whole engineering organization is meant to follow: versioned, and changed through review. The same caution applies to community extensions. Spec Kit publishes a list of them, but it doesn’t review their code.
Start with your next small feature. Set up the repo in one command, write a one-page constitution, then run two commands.
Three defaults make Spec Kit heavy on a small feature and leave gaps in it. Swap them, read the one page that’s left, and there’s less to read and less to guess.
✅ Lean spec vs no spec at all
I measured lean-spec against default Spec Kit, not against no spec at all, and without a spec an agent starts coding sooner. What the extra two minutes buy is control:
- 🎯 You make the decisions. Open questions come to you before any code, instead of turning into silent guesses inside it.
- 🏁 Done is your test command, not the agent’s opinion. The spec’s Done when line names a command, such as
npm test. The agent is finished only when it exits 0, and it may not edit the command or weaken a test to get there. - 🧪 Tests come from examples you approved. In step 1 the agent writes a Given/When/Then example under each rule, and you check them in step 3. Step 4 turns each one into a test, named after its rule, that fails before the code exists. So the tests check what you agreed, not just what the code happens to do.
- 🚧 Scope has guardrails. Out of scope and don’t-touch lines stop the agent wandering into work nobody asked for.
- 📏 The code matches your codebase. The constitution and the Like file keep every feature in the same style.
- 👀 Review gets faster. The reviewer checks the diff against one page of agreed rules, and any file that serves no rule stands out.
- 🗂️ The why stays with the code. The spec sits in the same pull request, so six months later nobody digs through chat history.
Skip it for a typo or a one-line fix. Use it whenever there’s a decision someone could get wrong.
🎯 Key takeaways
- Keep Spec Kit’s habits, and skip its paperwork on small features. MUST rules, real examples, and questions before code.
- Write repo-wide rules once, in the constitution. Specs get shorter and stop repeating them.
- Read the one page before any code exists. It’s where a missed decision is cheapest to catch.
- Answer its questions yourself. Two of its three picks were the same guesses default Spec Kit made.
- Run the done-when command yourself before you approve. The agent’s report is a claim; the exit code is the evidence.
- Switch to the full flow when there’s no file to copy.
📦 Get the preset
- lean-spec.zip: unzip it once and pass the folder to
specify init --preset, or add it to a repo that already has Spec Kit withspecify preset add --from https://deanja.in/templates/lean-spec.zip - The four files, to read first: preset.yml · spec template · specify prompt · implement prompt
📚 Further reading
- Spec Kit · documentation · preset reference
- Putting Spec Kit Through Its Paces: Radical Idea or Reinvented Waterfall? Colin Eberhardt’s side-by-side timing
- Understanding Spec-Driven-Development: Kiro, spec-kit, and Tessl Birgitta Böckeler on three tools and where each overreaches
- How many words do we read per minute? Marc Brysbaert’s review of reading speed, the basis for the reading estimates